Introduction:
It just takes 10 minutes to save hundreds of work hours by giving a safe and low-humidity travel to the CMS experiment assembled modules. This guide will explain step by step how to ensure the modules inside their carrying boxes.
Important! Read this guide before shipping any modules: Otherwise you may be ruining months of work.
Important! Wear gloves while handling the modules: The carrier plate is coated with ESD-safe material. To prevent degradation of the coating by finger grease and dirt, avoid direct contact with the plate.
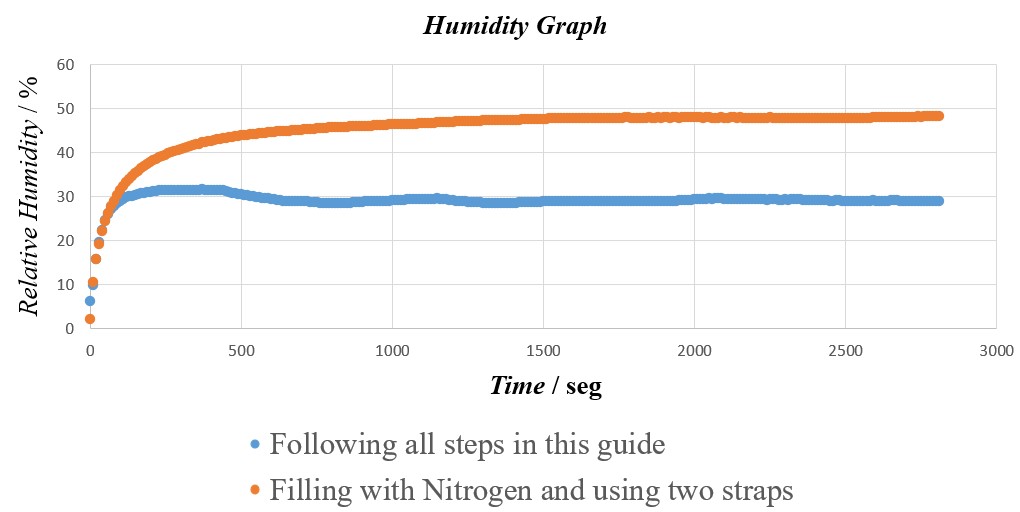
Reasoning: 20 % Improvement
-
Even though the carrier boxes are designed to be waterproof, we have tracked the humidity levels inside, and the isolation on most cages will not be enough to keep humidity under room values for more than a few hours.
We have spent weeks testing different methods that make it possible to mantain humidity as low as needed. In the following graph, it can be seen how this protocole makes a difference of 20 %, using the same type of carrier box in similar environments over two days.
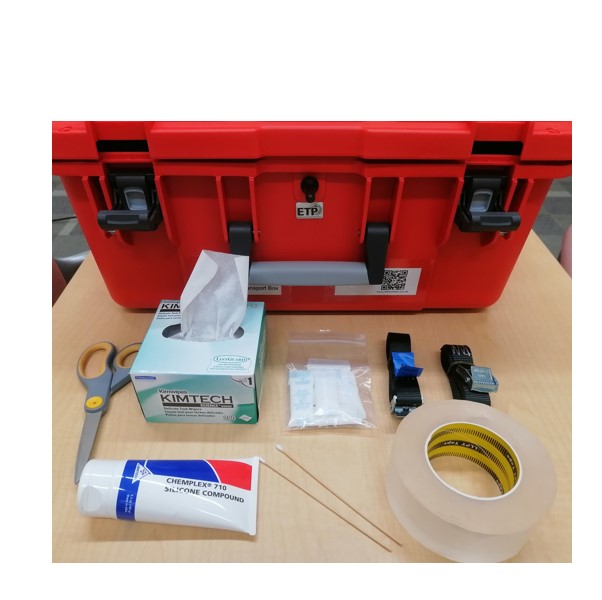
Materials:
| Material | Details |
|---|---|
| Carrier Box | Provided by KIT |
| Two Straps | Included with the carrier box |
| Nitrogen Gas | Cylinder with gauge and Schrader type valve connector |
| Silicone | e.g. ‘Chemplex 710 Silicone Compound’, used as barrier to corrosion and moisture. May be applied using cuetips. |
| Desiccant bags | Two small size. Make sure the bags are not damaged. |
| Nanotape | Non chemical adhesive. Not corrosive while having a great sticking power. |
Step 1: Apply Silicon on Gasket
Isolating the inside of the box
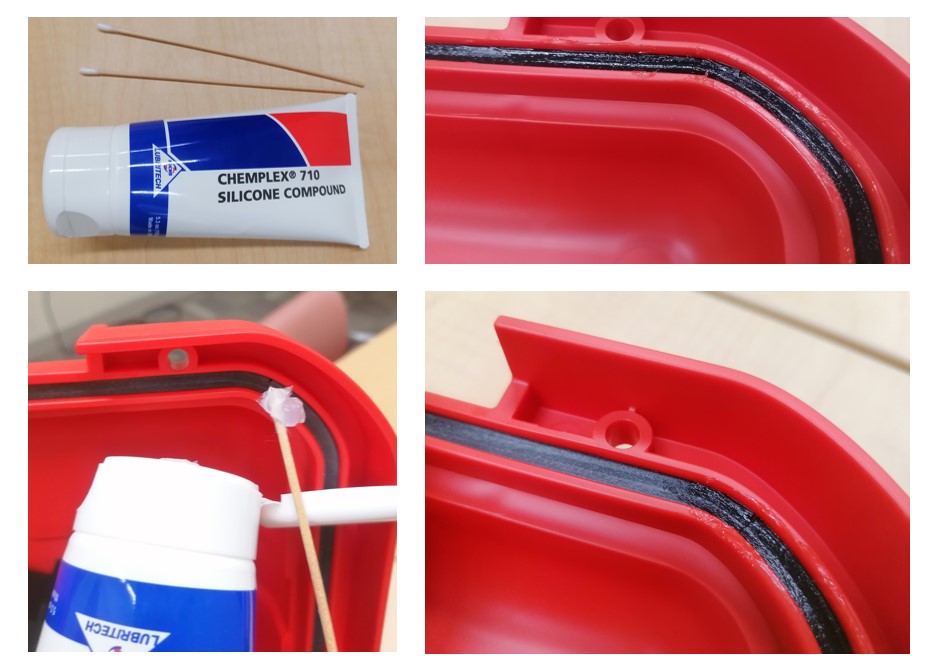
- First, we will make sure that the gasket of the box is in good condition. It should not have any cracks, and the joint of the gasket should not have an obvious gap.
In order to avoid leaks due to these possible issues, and, in general, to ensure a correct sealing, we recommend the use of Silicon. It can be gently applied all along the gasket using a cue tip, cleaning excess with a lint free wipe.
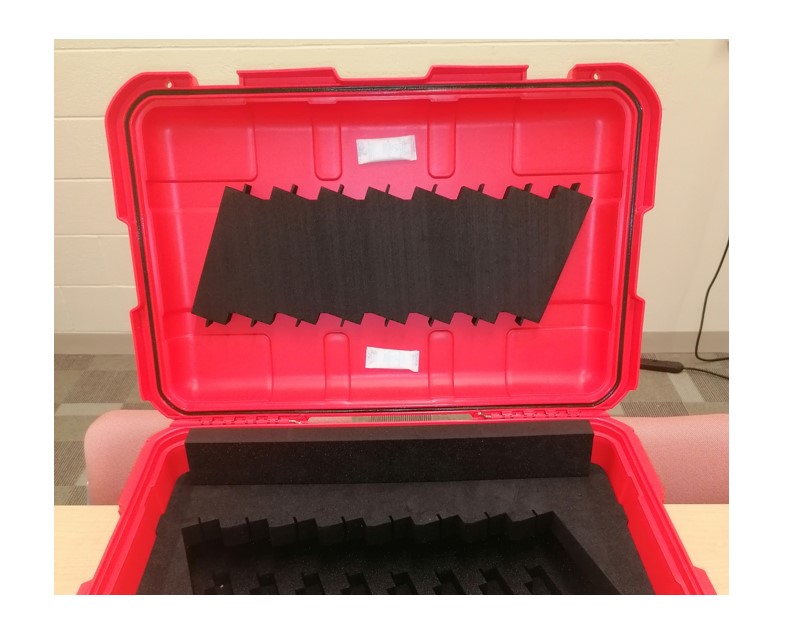
Step 2: Stick Desiccant Bags
Controlling the inside environment
- We will be using nitrogen gas to get humidity levels down (< 5 %). Moreover, introducing a desiccant agent inside will keep it at optimal conditions in the long term (< 30 %).
Thus, the second step will be to stick two small desiccant bags inside the box using Nano tape. They can be placed anywhere as long as they do not interfere with other elements, in this guide we suggest sticking them to the cover.
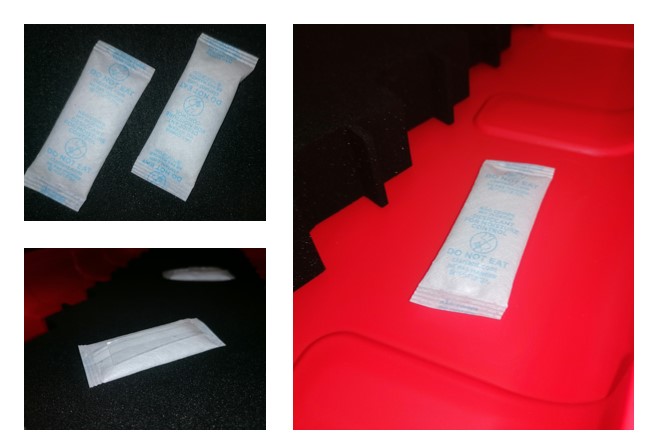
Suggested placing of the desiccant bags:
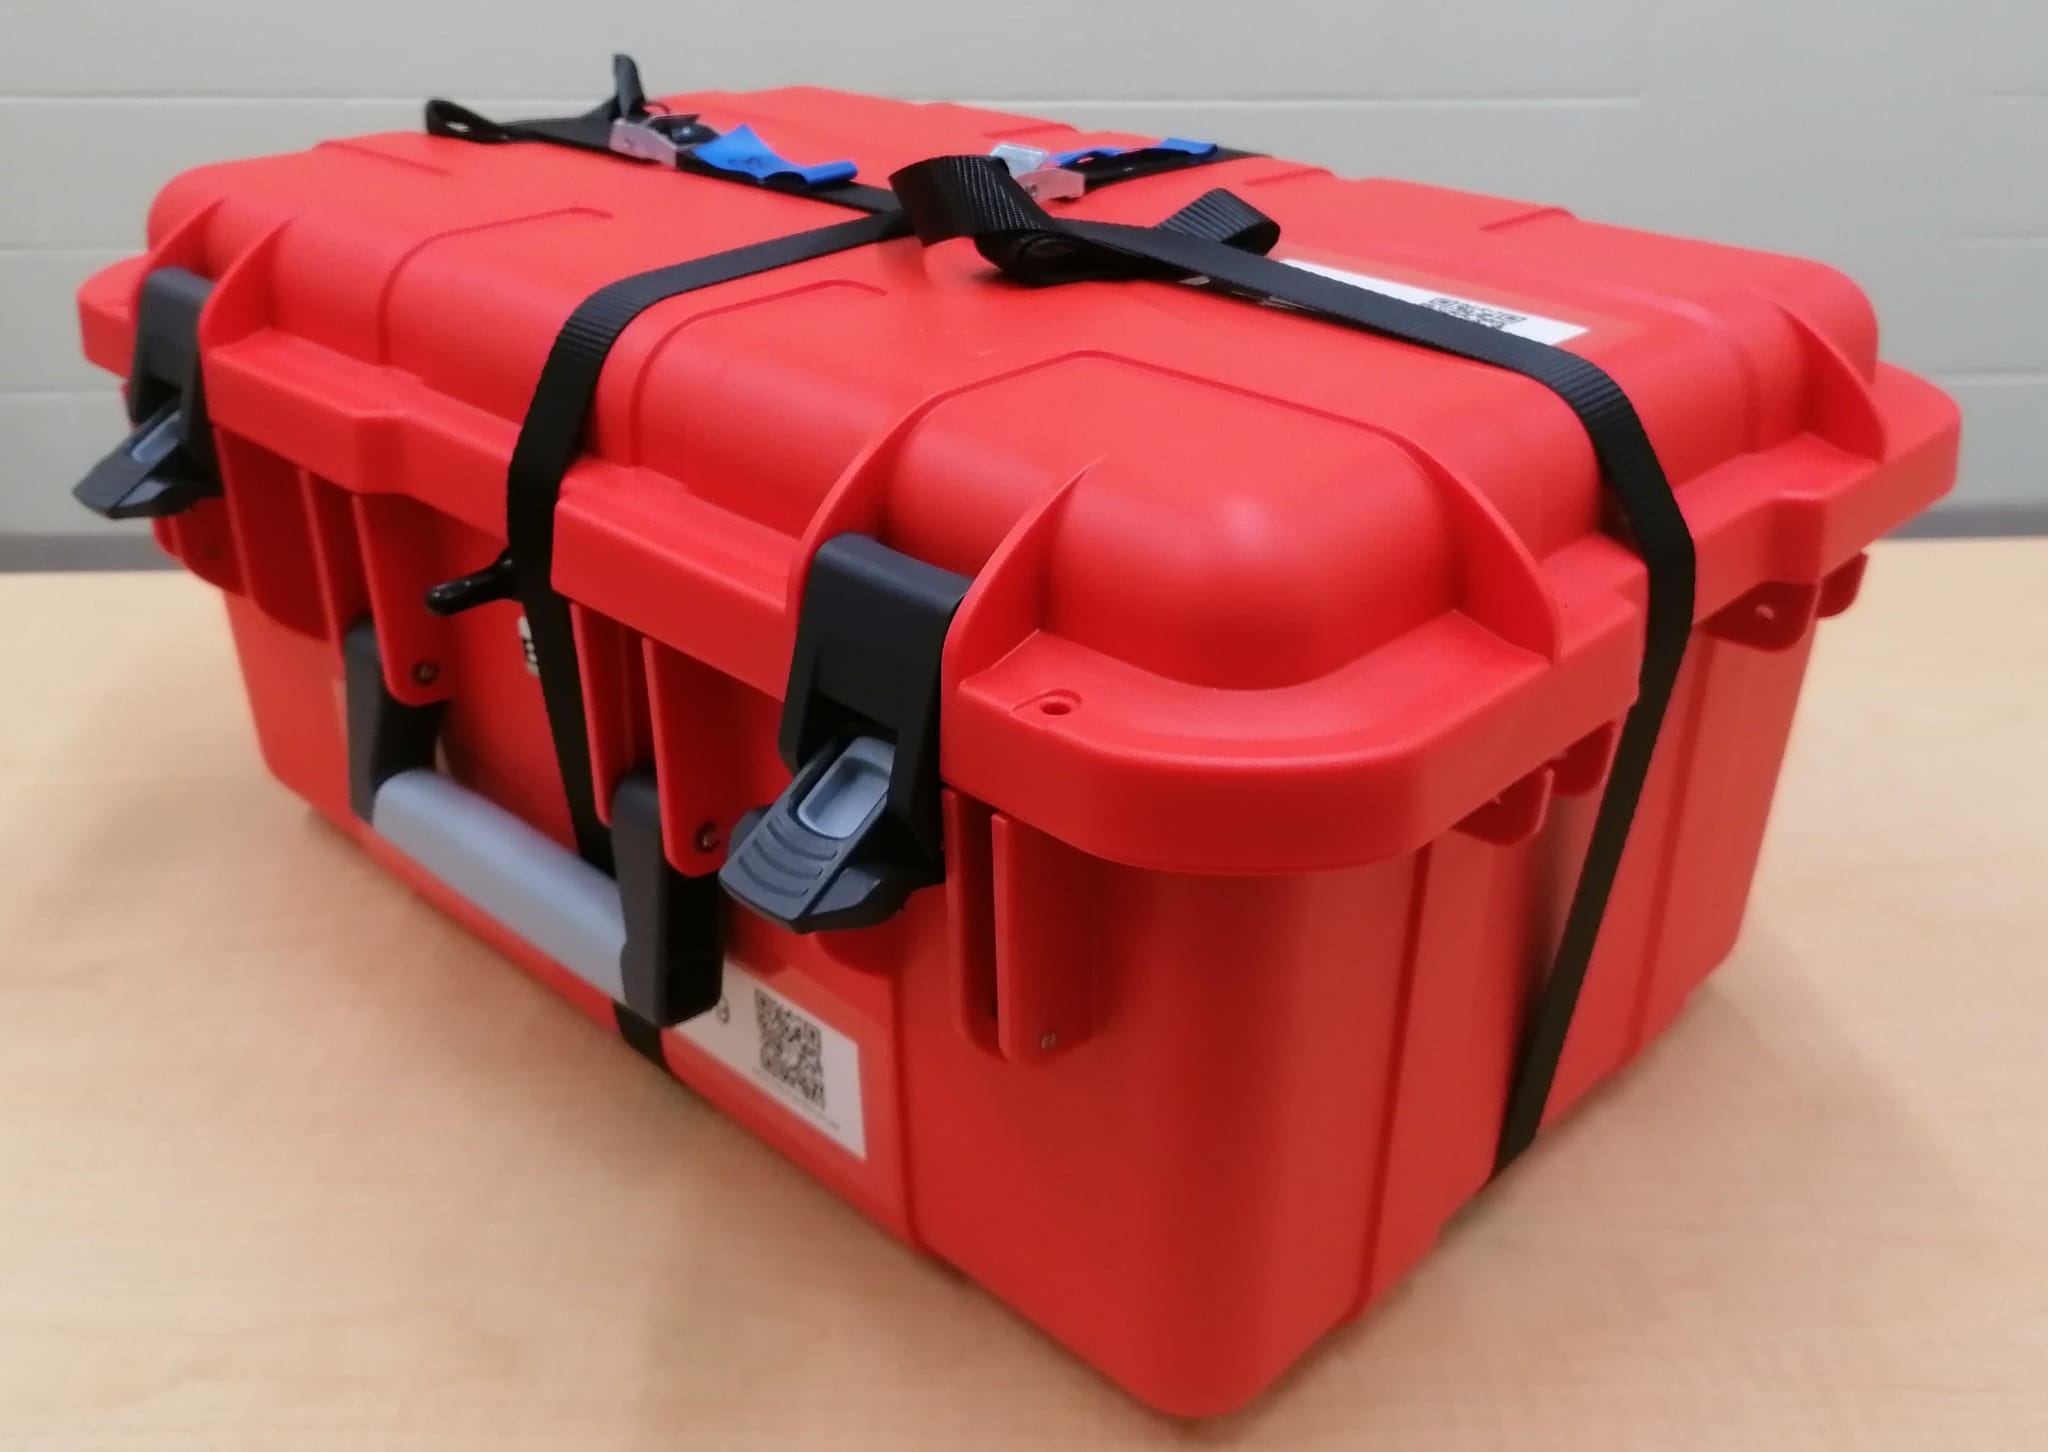
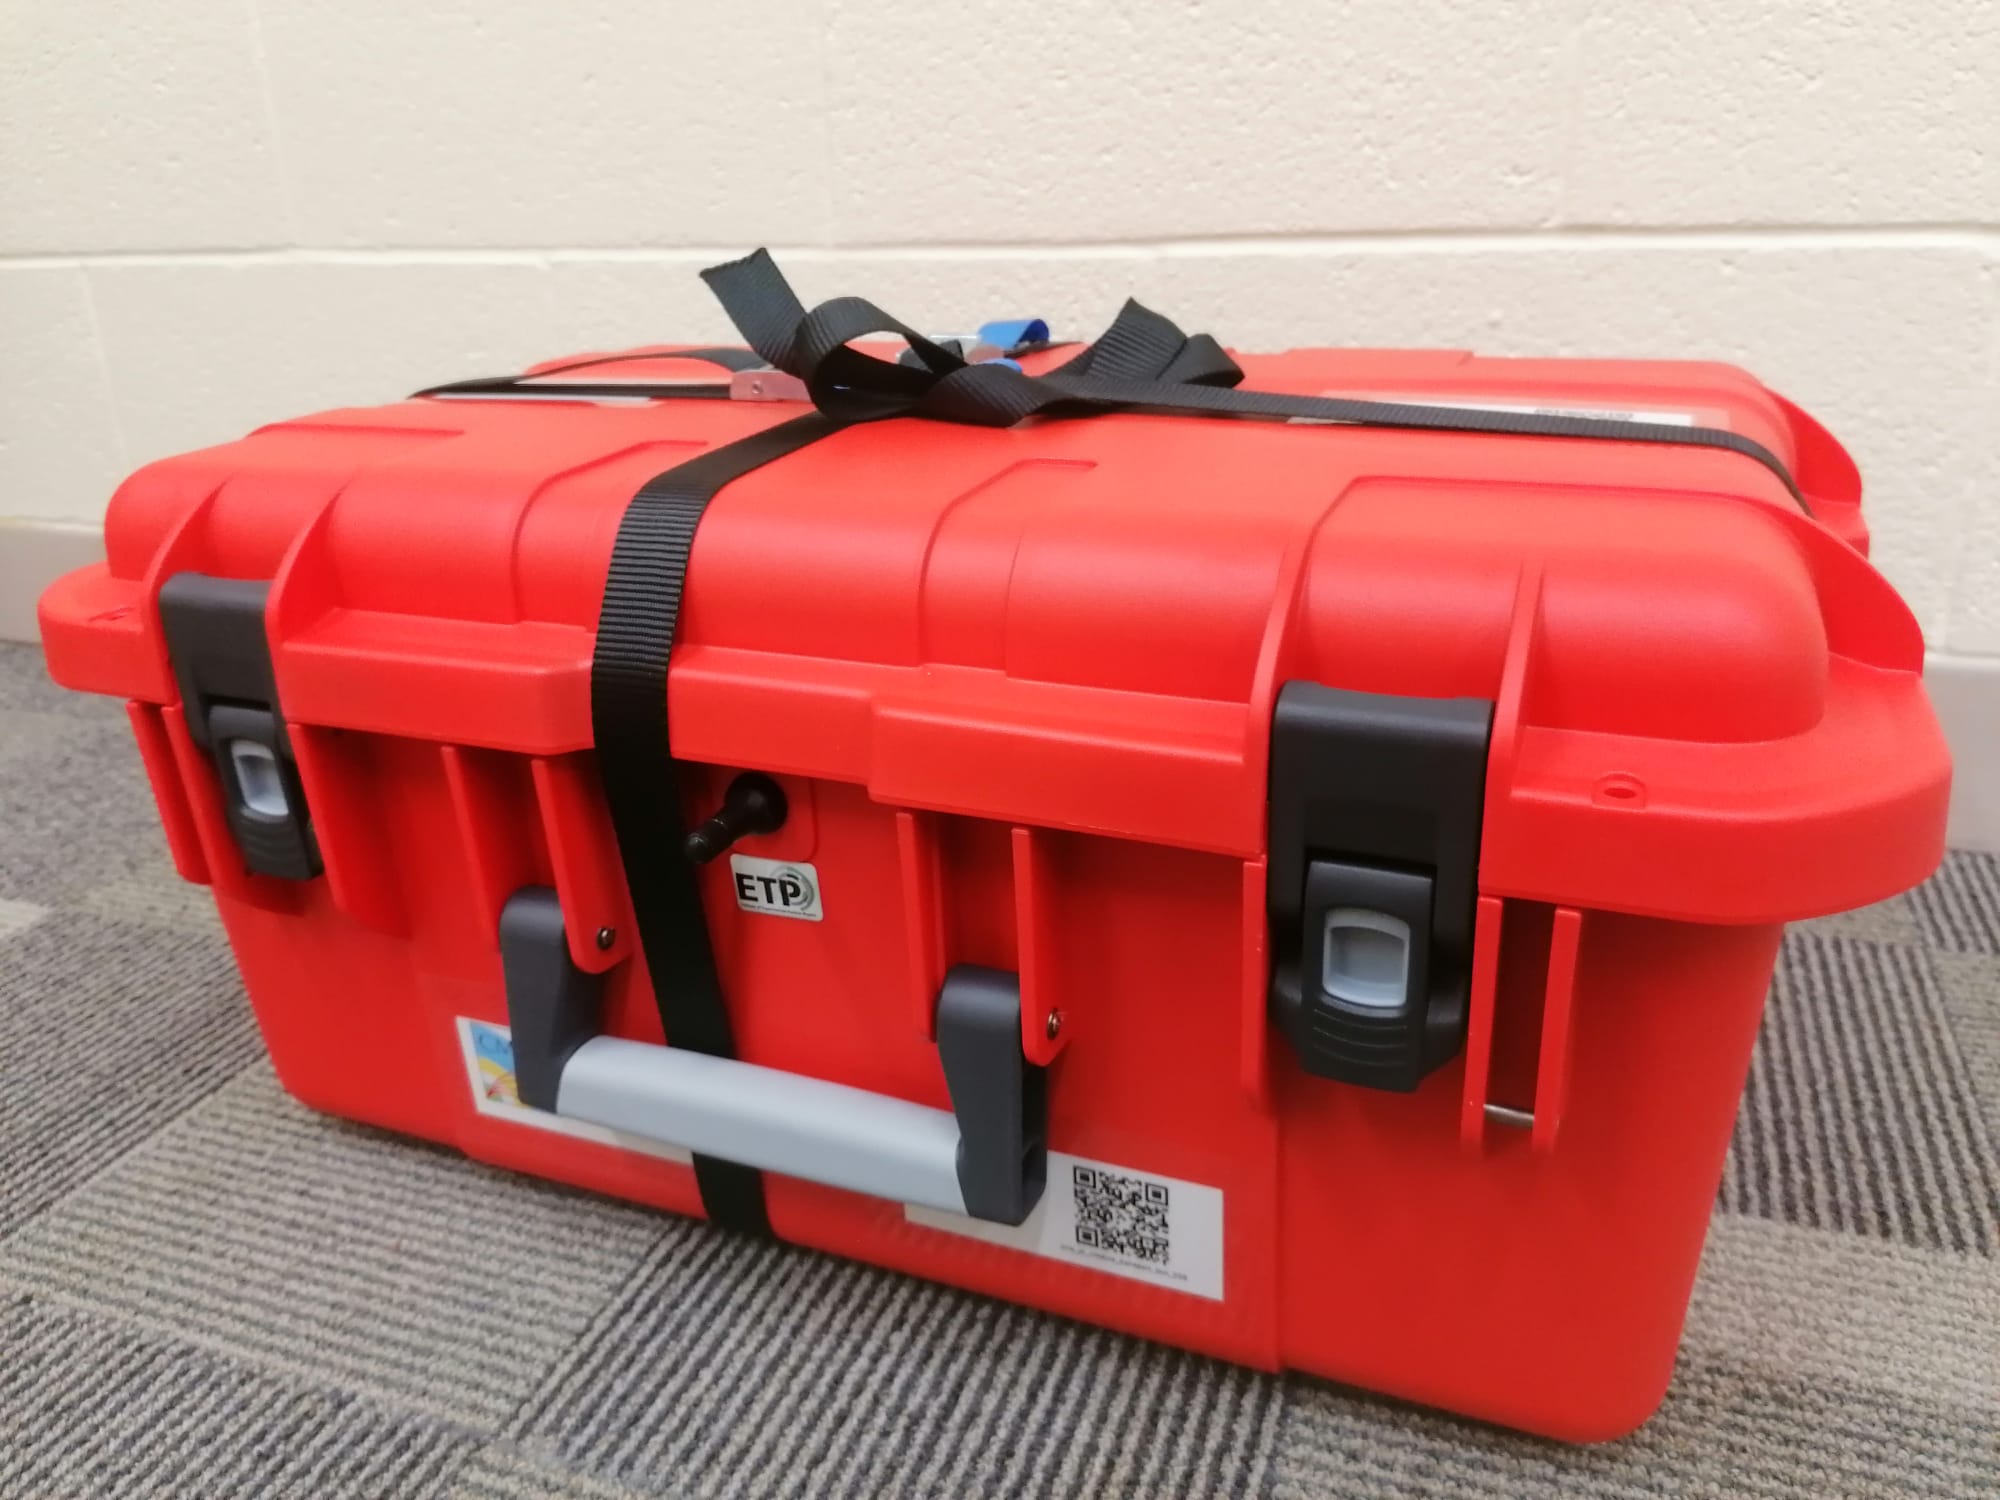
Step 3: Placing Straps
Almost done
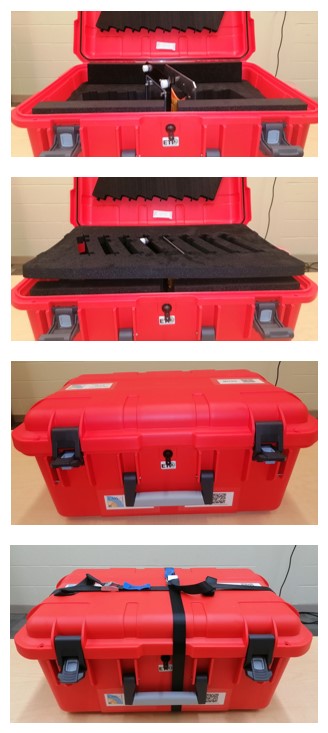
- After carefully introducing all modules in the box, and placing all the foam inserts, we will close the box without anchoring the two clamps.
We will now ensure both straps around the box, in a X configuration, as shown in the picture. We should avoid over-tightening since it will bend the box producing leaks.
We will not close the clamps yet to avoid over pressure, which could damage the box or/and modules. -
Carrier box should look like this before next step:
Step 4: Fill with Nitrogen Gas
Taking humidity down
- We will now proceed filling the box with nitrogen gas, "for about 5’", through the valve on the front of the box. It must be enough to lower humidity under 5 %, leaving an easier task for the desiccant bags which will have to keep it under 30 %.
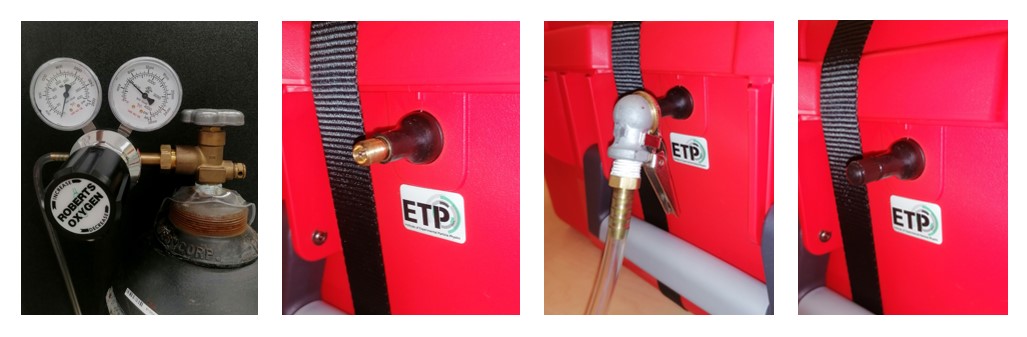
Step 5: Close Clamps & Valve
Ready for shipping
- Finally, after filling the cage with Nitrogen, close the two clamps on the carrying box and put valve cap again. It is now ready to pack and ship. Surplus strap can be folded.
After this, modules will be travelling in a friendly environment. Thanks for your time :)
PREVIOUSMaPSA Test