Download PDF: PDF Version
Introduction
Use the ROH bending tool to prepare the ROH tails. There are 4 components for the ROH bending tool:
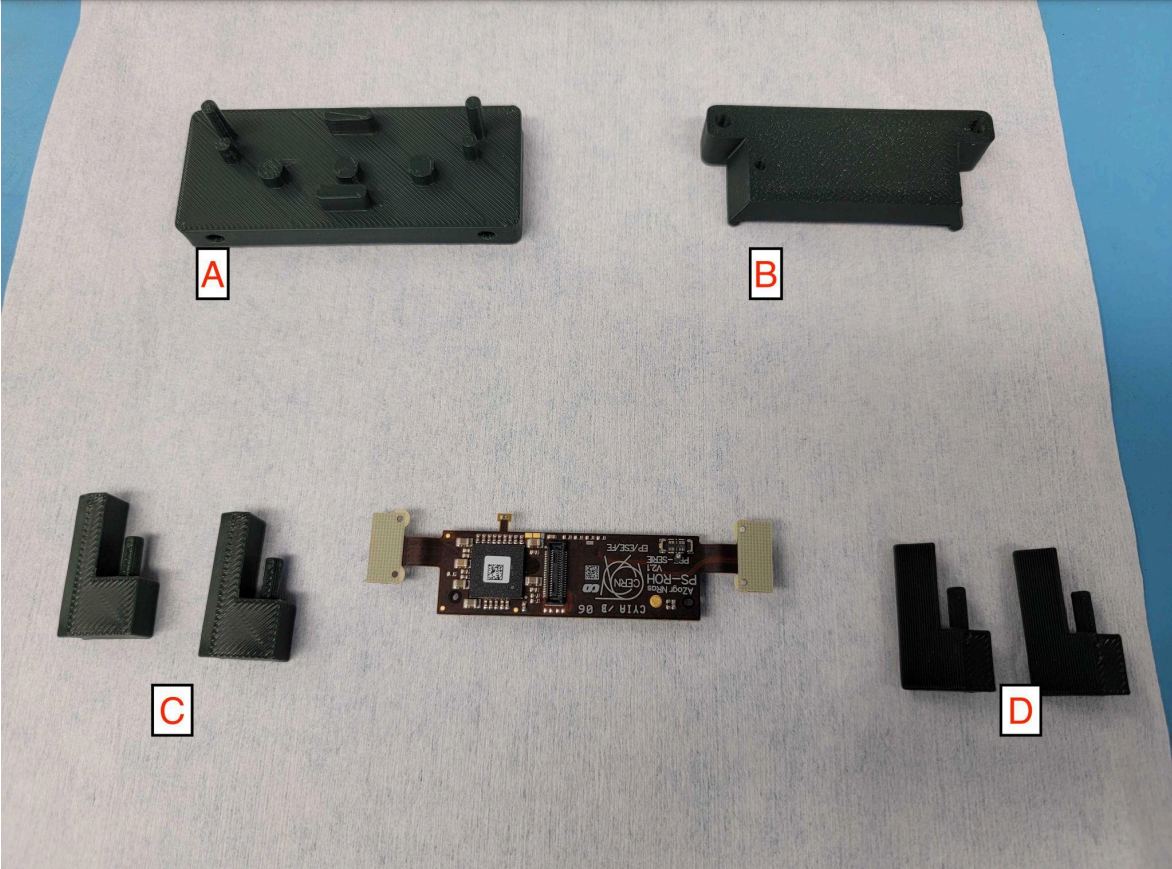
- 🔴 (A) Base
- 🟠 (B) Hat
- 🟢 (C) First bend pair
- 🔵 (D) Second bend pair
ROH bending tool procedure
Step 1: Placing the ROH
Place the ROH on the base, with the temperature sensor facing away from the alignment posts. It should fit snugly in the space between alignment edges.
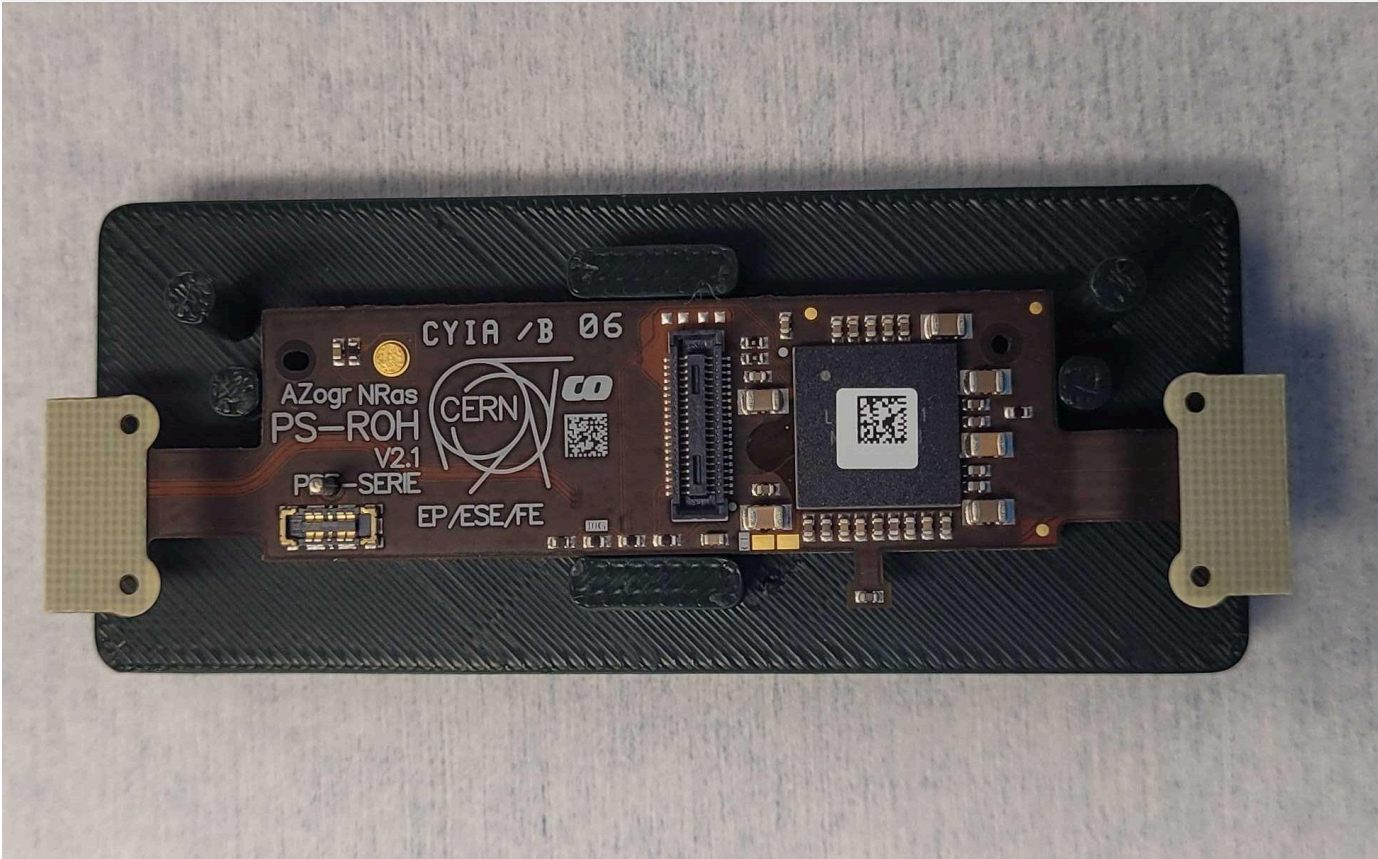
Step 2: Hat
Place the hat over the ROH, using the alignment pins.
Step 3: First bend
Bend the ROH tails over the hat’s rounded sides.
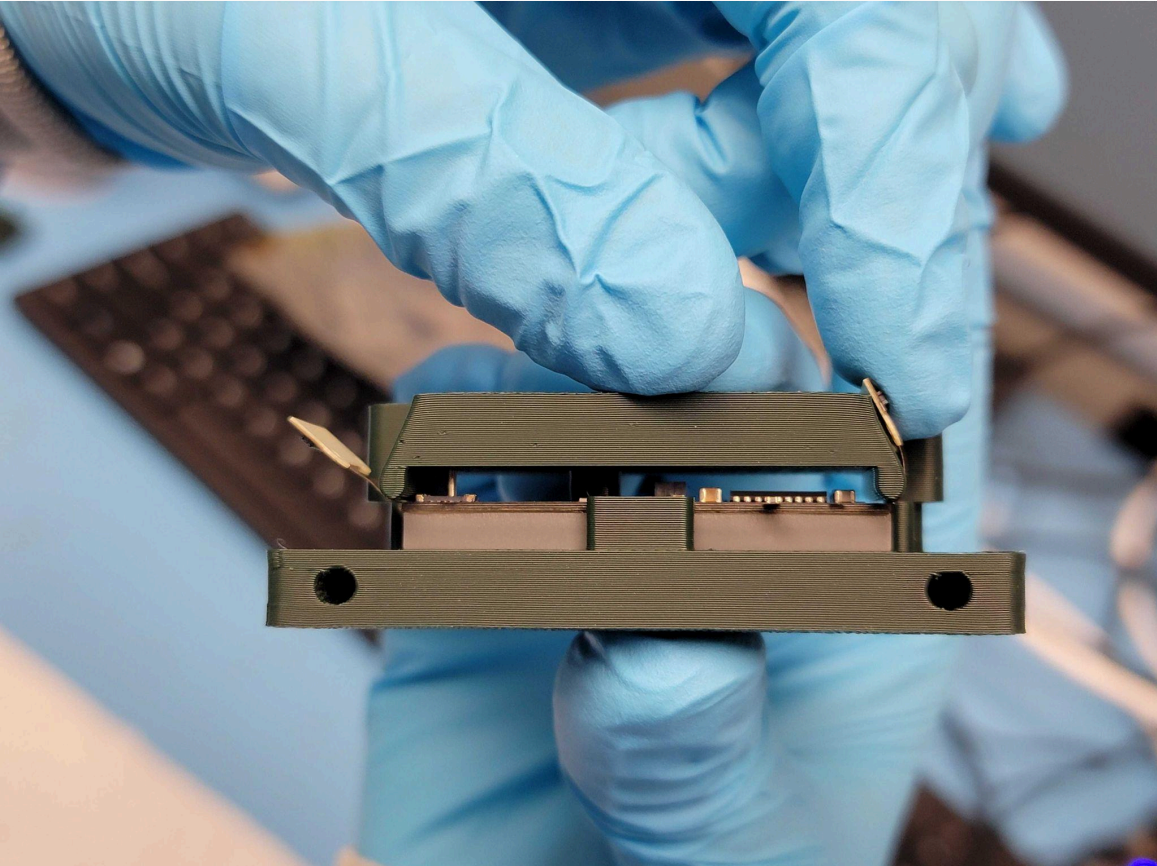
Step 4: First bender pair
Slide the first bender pair into the holes on the base. The long side should be facing out from the center of the base. The tail should fit between the hat and the first bend pieces.
Step 5: Downward bend
Bend the ROH tails downward over the long face of the bender.
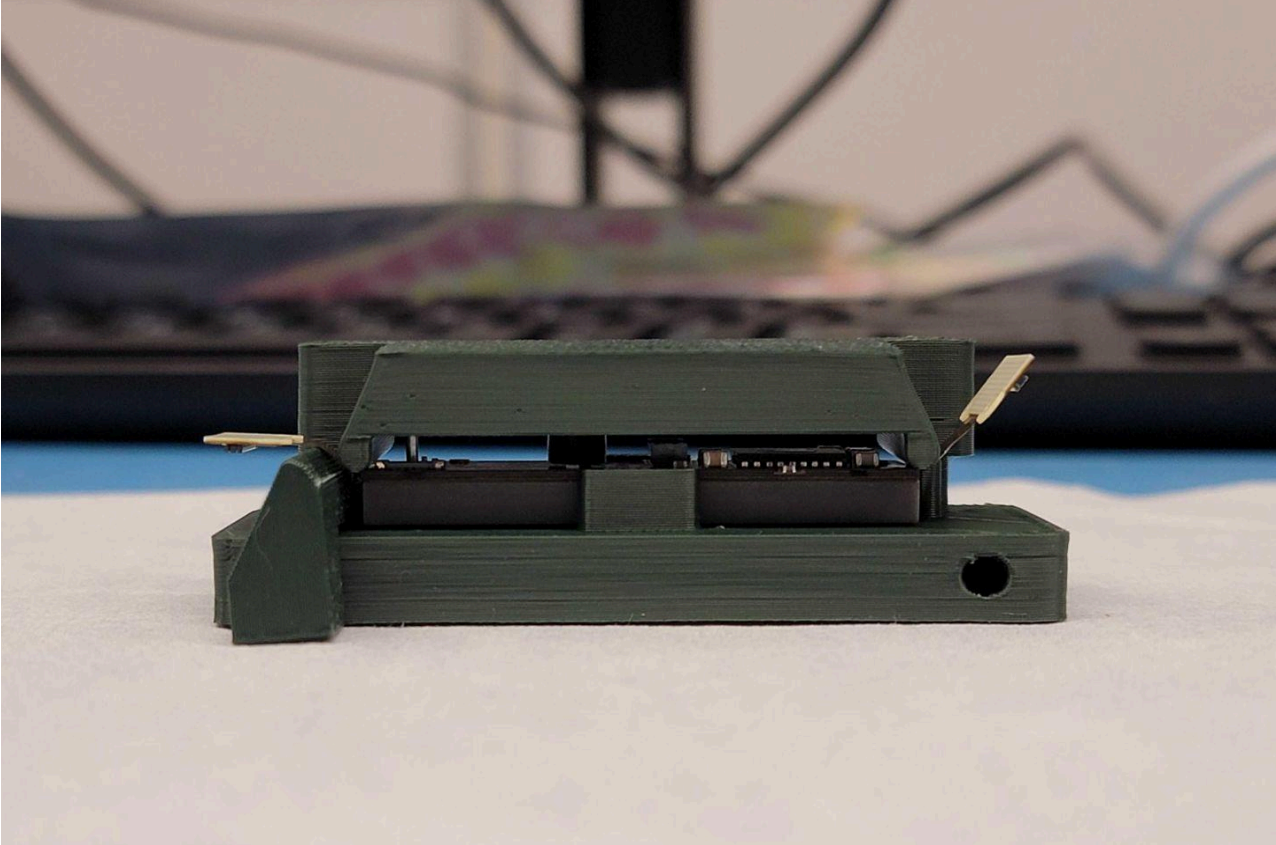
Step 6: Second bend pair
Remove the first bend pair, and insert the second bend pair. The tails should fit between the pieces and the hat. The rounded end should be towards the inside of the bending tool.
Step 7: Upward bend
Press the connectors against the flat face of the bender, this will give the tails a counter bend, allowing them to be held straight.
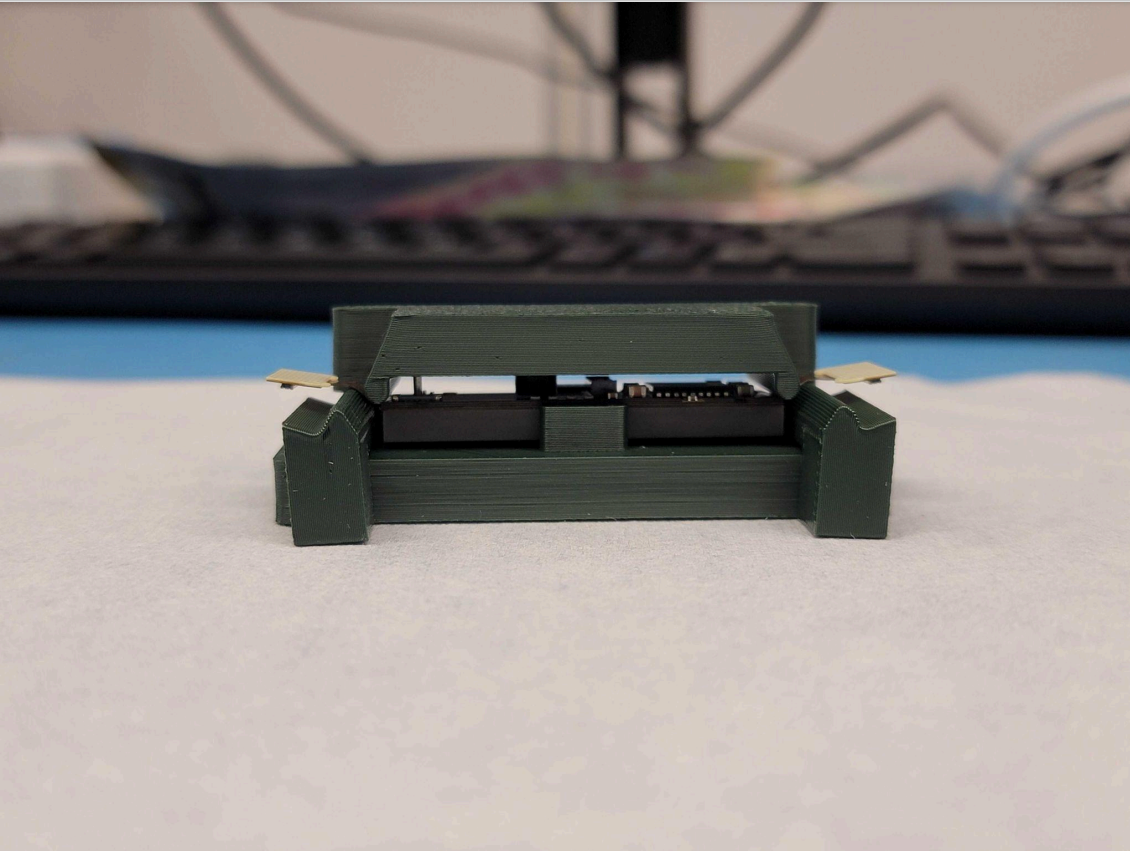
Step 8: Removal
Remove all pieces and remove the ROH.
Step 9: Small adjustment
Apply a small downward bend to the temperature sensor, this will ensure contact to the PSs when attaching to the module.